


12 Jul Surface Finishing Process Validation
Surface finishing process validation is the structured engineering activity that confirms a defined set of process parameters will consistently deliver the required surface quality on production parts. Without a validated process, deburring, polishing, and surface smoothing results depend on operator judgment rather than controlled variables, making quality unpredictable across shifts, machine changes, and media age cycles. This article walks through the complete validation sequence used in industrial surface finishing, from initial sample testing through parameter locking and production release.
In This Article
Why Process Validation Matters Before Production
Surface finishing is a multivariable process. The final result depends on machine type, machine load, media type, media grade, compound concentration, water flow rate, cycle time, and part geometry, all interacting simultaneously. A process that works on a sample batch may fail in full production if any of these variables shift outside the tested range.
In regulated industries such as medical device manufacturing and aerospace component production, validation is a formal engineering requirement. In general manufacturing, including automotive fasteners, CNC machined housings, and stamped brackets, validation is a practical necessity for reducing scrap, avoiding rework, and maintaining delivery commitments. Attempting production without a validated process is a common source of surface quality complaints and batch rejections.
Starting Point: Sample Submission and Requirements Definition
The validation process begins before any machine is run. The first step is collecting representative production parts and defining the acceptance criteria clearly in engineering terms.
Sample parts should represent the full production lot in terms of material batch, heat treatment condition, pre-machining state, and surface contamination level. Testing with cleaned, specially prepared samples that do not reflect actual factory conditions leads to validation results that will not transfer to production.
Acceptance criteria must be defined before testing starts. These should include surface roughness targets expressed as Ra or Rz values, edge condition requirements such as maximum allowable burr height or minimum edge radius, visual requirements such as absence of pitting or discoloration, and dimensional tolerances if material removal is a concern for tight-tolerance features.
Without defined acceptance criteria, the validation exercise becomes subjective. Engineers end up debating whether a result is good enough rather than measuring against a fixed standard.
Machine and Media Selection for Sample Testing
Before running sample tests, the appropriate machine type and media family must be selected based on the part characteristics. This selection is not arbitrary and directly affects what the sample test can tell you.
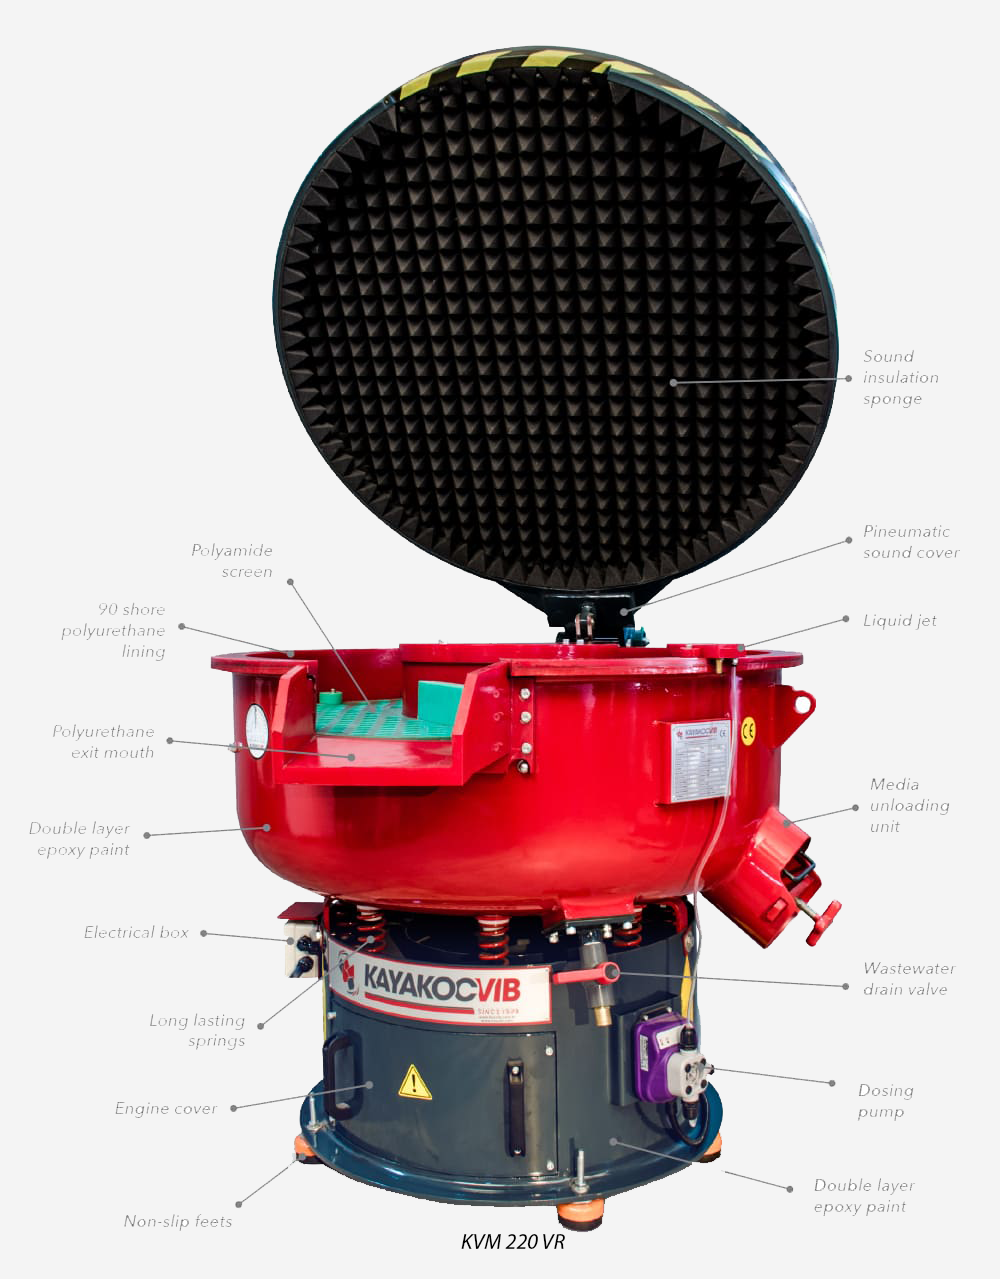
For small to medium steel or stainless steel parts with standard burrs from CNC machining or stamping, a circular vibratory machine is a practical starting point. The KAYAKOCVIB KVM series circular vibratory finishing machines are commonly used for this type of sample work because they accept varied part geometries and allow easy adjustment of compound concentration and cycle time during testing.
For high-precision small parts requiring short cycle times and tight surface finish control, centrifugal disc machines such as the KAYAKOCVIB KSM series are more appropriate. These machines apply significantly higher process intensity than vibratory machines and can reach target surface finish values in minutes rather than hours, which also means parameter sensitivity is higher and must be validated carefully.
For long components, delicate parts, or parts that cannot tumble freely, trough-type vibratory machines such as the KAYAKOCVIB TVM series are preferred. The linear motion pattern of trough machines reduces part-on-part impact and suits parts that would be damaged in a circular bowl.
Media selection follows the part material. For steel and stainless steel parts, ceramic media provides the cutting action needed for effective deburring. For aluminum and softer alloys, plastic media is generally preferred to avoid aggressive surface cutting that would damage soft metal faces. Mixed metal loads should be avoided in validation because the media selection cannot be optimized for two different materials simultaneously.
Step-by-Step Sample Testing and Validation Sequence
A structured sample test follows a defined sequence to generate data that can be transferred directly to production parameters.
- Define the baseline condition. Record the initial surface roughness, burr height, edge condition, and visual state of each sample part before any finishing is applied. This gives a measurable starting point.
- Select the trial parameters. Choose an initial media type and grade, compound type and concentration, water flow rate, and cycle time based on the part material and target finish. For steel parts, a 943 deburring and polishing compound is a typical starting choice. For aluminum, an 085 compound is more appropriate. A 028-S degreasing compound is commonly added when oil or coolant contamination is present.
- Run the first test batch. Load the machine with the correct media-to-part ratio, which is typically 2:1 to 4:1 by volume depending on part size and geometry. Run the machine for the initial trial cycle time.
- Inspect and measure the result. After the first run, separate parts from media, clean the parts, and measure surface roughness, edge condition, and visual quality. Compare against the acceptance criteria defined in the requirements step.
- Adjust and repeat. If the target has not been reached, adjust one variable at a time. Increasing cycle time is the first adjustment if cutting action is insufficient. If the result is directionally correct but rough, the media grade or compound concentration may need adjustment. Each adjustment must be documented so the effect of each variable is understood independently.
- Confirm repeatability. Once a parameter set produces acceptable results, repeat the test with a second batch of parts under identical conditions. A single passing test is not validation. Repeatable results across at least two or three test batches under controlled conditions are required before a parameter set can be considered validated.
- Document the validated window. Record the confirmed parameter set including machine type, machine load weight, media type, media grade, media fill volume, compound type, compound dosing rate, water flow rate, cycle time, and separation method. This document becomes the process specification for production.
Process Parameters That Require Validation
The following table summarizes the key process parameters that must be defined and confirmed during surface finishing process validation. Each parameter affects the final surface quality and must be locked before production release.
| Parameter | Typical Range | Effect on Result |
|---|---|---|
| Media type | Ceramic, plastic, steel | Determines cutting intensity and surface finish character |
| Media grade | Coarse, medium, fine | Controls material removal rate and surface roughness |
| Media-to-part ratio | 2:1 to 5:1 by volume | Affects coverage uniformity and part-on-part contact risk |
| Compound concentration | 1% to 5% solution | Controls cutting speed, surface brightness, and inhibition |
| Water flow rate | Application dependent | Maintains compound concentration and flushes swarf |
| Cycle time | 15 min to 4 hours | Determines total material removal and edge rounding |
| Machine load | Per machine specification | Affects process intensity and part movement pattern |
These ranges are indicative. Actual validated values depend on part geometry, material, burr size, and surface finish requirement. Every production application requires its own confirmed parameter window determined through sample testing.
Washing, Drying, and Separation After Finishing
Validation must extend beyond the finishing stage. After the finishing cycle, parts must be separated from media, cleaned, and dried. The condition of the part at final inspection depends on all these steps, not just the finishing cycle itself.
Parts that are not washed after wet finishing may carry compound residue, swarf, and fine media debris into downstream processes. This can cause adhesion problems in coating operations, contamination in clean assembly environments, or measurement errors during surface roughness inspection.
For parts with recesses, blind holes, or complex internal geometry, pressure washing or ultrasonic cleaning may be necessary to remove finishing residue that simple rinsing cannot reach. This washing step should be included in the validated process description so it is not omitted during production.
Drying must also be part of the validated process for parts that will be stored, coated, or inspected immediately after finishing. Wet parts left in bins can develop flash rust on steel surfaces or water staining on aluminum parts within hours. Vibratory drying with corn cob or other dry media is a common solution for small parts, and this step should be included in the validation if it is required for the final surface condition.
Transferring Validated Parameters to Production
Once the validated parameter set is confirmed through repeatable sample testing, the transfer to production requires careful control. The validated parameters must be written into a process specification document that production operators can follow without interpretation.
Machine settings should be fixed where the machine allows it. Compound dosing should be automated rather than manually measured where possible, because manual dosing introduces variation between operators and shifts. Media condition must be tracked because media wears over time and its cutting performance changes. Media age and replenishment frequency should be included in the validated process description.
A simple first-article inspection at the beginning of each production batch confirms that the validated process is producing the expected result before the full batch is committed. This is not a repetition of the full validation exercise, but a checkpoint that catches machine deviations, compound errors, or media condition issues before they affect large quantities of parts.
Common Reasons Validation Results Do Not Transfer to Production
Several recurring issues cause validated sample test results to fail in production conditions. Understanding these failure modes helps engineers design a more robust validation process.
- Sample parts do not represent production parts. If validation samples were specially cleaned, deburred by hand, or selected from a different material batch, the validated parameters may not apply to actual production parts.
- Machine load is different in production. Running a full production load in a machine that was validated at a partial load changes the process intensity, media movement pattern, and part-to-part impact behavior.
- Compound dosing is inconsistent. Manual compound dosing varies between operators. A validated result achieved with precise compound concentration may not be reproduced when dosing is approximate.
- Media condition has changed. New media cuts more aggressively than conditioned media. If validation was run with partially worn media and production starts with new media, the result will differ.
- Water quality varies. Hard water or variable pH affects compound behavior. If the validation was run with different water than the production machine uses, the surface chemistry may not behave the same way.
Frequently Asked Questions
How many sample parts are needed for a meaningful surface finishing process validation?
There is no universal minimum, but testing with three to ten representative parts per trial condition is a common industrial practice. Validation should include at least two or three repeated test batches under the same conditions to confirm repeatability before a parameter set is accepted as production-ready.
Can the same validated parameters be used for different part geometries?
Generally not without at least partial re-validation. Part geometry affects media contact, part movement in the machine, and risk of media lodging in recesses or holes. If a new part geometry differs significantly from the validated part, at least a verification run on the new geometry is required before assuming the parameters will transfer.
How often should a validated process be re-validated?
Re-validation is recommended when the machine is replaced or overhauled, when media type or supplier changes, when compound formulation changes, when part material specification changes, or when surface quality complaints indicate a process shift. Some regulated industries require periodic re-validation at defined intervals regardless of visible process changes.
What is the difference between a sample test and a formal process validation?
A sample test confirms that a set of parameters can produce acceptable results under controlled conditions. A formal process validation goes further by demonstrating that those results are repeatable, transferable to production conditions, and documented in a controlled process specification that production can follow without engineering judgment at every step.
Related Process Equipment
Conclusion
Surface finishing process validation is the engineering discipline that converts successful sample results into repeatable, controllable production outcomes. It requires clearly defined acceptance criteria, representative sample parts, systematic parameter testing, and documented confirmation of repeatability before any production batch is released. The investment in structured validation reduces long-term scrap, prevents rework, and gives quality and production teams a reliable process specification they can monitor and maintain. Skipping or shortcutting the validation phase does not save time in practice; it relocates the problem from the engineering stage into production, where the cost of variation is significantly higher.
Sorry, the comment form is closed at this time.