



10 Jul Surface Finishing Troubleshooting
Surface finishing troubleshooting is one of the most practical engineering activities in any mass finishing operation. When deburring results are inconsistent, surface quality drops below specification, or cycle times increase without explanation, the root cause is rarely a single isolated factor. Most finishing problems emerge from a combination of media wear, incorrect compound dosing, improper machine loading, process parameter drift, or part-handling issues. This guide provides a structured diagnostic approach for production engineers working with vibratory finishing machines, centrifugal disc machines, and drag finishing systems across steel, stainless steel, aluminum, and mixed metal applications.
In This Article
Why Finishing Problems Are Rarely Single-Cause
In a mass finishing environment, multiple process variables interact simultaneously. Media type, media fill level, compound concentration, water flow rate, machine amplitude, cycle time, and part load all affect the finishing result. When one variable drifts out of its validated range, the effect can propagate through the process in ways that are not immediately obvious. For example, a drop in compound dosing reduces lubrication and cleaning action, which then accelerates media wear, which in turn changes the cut rate and surface texture. A process engineer chasing only the symptom without identifying the underlying variable chain will often apply the wrong correction.
This is why surface finishing troubleshooting requires a structured root cause methodology rather than ad hoc adjustments. Changing too many variables at once makes it impossible to identify which correction actually resolved the problem. The correct approach is to isolate one variable at a time, test against a validated baseline, and document the result before moving to the next adjustment.
Root Cause Categories in Mass Finishing
Finishing defects and inconsistent results can generally be grouped into four root cause categories. Understanding which category applies to the observed symptom guides the corrective action efficiently.
The first category is media-related causes, including media wear, incorrect media type, wrong media size or shape for the part geometry, and media lodging inside part features. The second category is compound and water-related causes, including incorrect compound type, under-dosing or over-dosing, hard or soft water chemistry, insufficient rinsing, and staining from compound residue. The third category is machine and process parameter causes, including incorrect amplitude setting, incorrect rotational speed, overloading or underloading the machine, and insufficient or excessive cycle time. The fourth category is part and batch-related causes, including part geometry not matched to the current media, mixed materials in a single batch, incorrect part-to-media ratio, and part damage from part-on-part contact at high intensity.
Media-Related Troubleshooting
Media condition is one of the most common sources of inconsistent deburring or polishing results. As ceramic or plastic media wears through repeated process cycles, its cutting ability decreases, its size reduces, and the risk of media lodging in small holes, threads, or blind features increases. Media that has worn below its effective size range should be replaced with fresh media before the process continues to degrade.
Incorrect media type is another frequent cause. For aluminum, zamak, and soft non-ferrous parts, plastic media is generally preferred because ceramic media can cause excessive material removal, surface marking, or part deformation. For steel and stainless steel parts requiring aggressive deburring, ceramic media provides the cutting action needed. Using plastic media on heavy steel burrs will typically result in insufficient deburring even after extended cycle times.
Media shape selection must match part geometry. Cylindrical or triangular media shapes work well for general deburring on flat and external surfaces. Angle-cut cylinders or cones can reach recessed features more effectively. If a finishing result consistently shows that internal edges or recessed areas are not fully deburred while external surfaces are already smooth, the media shape is often the variable to reconsider.
Media lodging inside drilled holes, threaded bores, or slots is a separate problem that requires either a change to a larger media size, a change in media shape, or an assessment of whether vibratory finishing is the appropriate process for that specific part feature. In some cases, drag finishing with controlled part orientation may be more suitable for parts with deep internal features.
Compound and Water-Related Troubleshooting
Compound selection and dosing control have a direct effect on cut rate, surface brightness, staining prevention, and media longevity. For steel parts, a compound such as a 943-type deburring and polishing liquid provides the alkaline chemistry needed to keep the process clean and support ceramic media performance. For aluminum and soft metals, an 085-type compound maintains the correct process pH and supports plastic media action without causing surface attack. In applications where heavy oil, cutting fluid, or chip contamination is present, a dedicated degreasing compound such as 028-S should be used as a pre-wash or in a separate cleaning cycle before the main finishing process.
Under-dosing compound is a common oversight in production environments where compound tanks are refilled infrequently. Insufficient compound concentration leads to increased friction between media and parts, accelerated media wear, poor surface brightness, and risk of rust formation on steel parts during the wet finishing cycle. Over-dosing compound creates excessive foam, reduces process visibility, and can leave compound residue on part surfaces that requires additional rinsing to remove.
Water quality affects compound performance. Hard water with high calcium content can reduce compound effectiveness and cause scale deposits on parts and inside the machine bowl. If consistent staining or white residue is observed on finished parts, water hardness should be measured and a water softener or appropriate compound adjustment should be considered. Final rinse water should always be clean to prevent compound carryover into the drying stage.
Machine Loading and Motion Troubleshooting
Incorrect machine loading is a process error that reduces both finishing quality and machine service life. Overloading a circular vibratory machine reduces the movement of the media-part mass, slows the toroidal flow pattern, and creates zones of low activity inside the bowl. Parts in these low-activity zones receive significantly less finishing action than parts near the bowl wall. The result is inconsistent finish across a batch.
Underloading creates the opposite problem. With insufficient mass in the bowl, parts can move erratically at high amplitude, causing part-on-part collisions that result in denting, edge damage, or surface bruising on softer materials such as aluminum or copper alloys.
A standard fill level for circular vibratory machines is typically between 80 and 90 percent of the bowl volume, including both media and parts. The correct part-to-media volume ratio depends on part size, geometry, and weight, and must be validated during process development. For small or delicate parts, a higher media-to-part ratio reduces part contact frequency and lowers the risk of mechanical damage.
Amplitude setting controls the intensity of the finishing action. Higher amplitude increases cut rate but also increases the risk of part marking on soft or thin-walled parts. If parts show unexpected surface marks or deformation, reducing machine amplitude and extending cycle time is often a more controlled approach than reducing media fill level alone.
Troubleshooting Checklist for Production Engineers
The following checklist provides a structured starting point for diagnosing surface finishing problems in production. Work through each category in sequence before making process changes.
- Confirm media type is correct for the part material and required surface finish.
- Measure current media size and compare against the original specification. Replace worn media if below minimum size range.
- Check for media lodging risk in part features such as holes, threads, or slots.
- Verify compound type matches the material and process chemistry requirement.
- Check compound dosing rate against the validated process specification.
- Measure water hardness and confirm rinse water quality.
- Verify machine fill level is within the specified range for the current batch.
- Check part-to-media volume ratio against the process baseline.
- Confirm machine amplitude and frequency settings against the validated parameters.
- Review cycle time and confirm it has not been shortened without engineering authorization.
- Inspect part surfaces for signs of part-on-part contact damage and assess if batch size or intensity should be reduced.
- If staining is present, check final rinse quality, compound residue, and drying time.
- If results are still inconsistent after checking the above, run a controlled test batch with only one variable changed at a time.
Defect Symptoms and Likely Causes
| Observed Symptom | Most Likely Root Cause | Corrective Action |
|---|---|---|
| Incomplete deburring on edges | Media worn, wrong media shape, insufficient cycle time | Replace media, adjust shape, extend cycle time |
| Surface marks or dents on parts | Part-on-part contact, high amplitude, low media ratio | Reduce batch size, lower amplitude, increase media ratio |
| Media lodging in holes or threads | Media size too small relative to feature | Change to larger media size or different shape |
| Staining or discoloration after finishing | Compound residue, hard water, insufficient rinsing | Improve rinse, check water quality, adjust compound dose |
| Inconsistent finish across a batch | Overloaded machine, low amplitude, uneven media distribution | Reduce batch size, verify fill level, check amplitude |
| Excessive media wear | Incorrect compound, under-dosing, high amplitude | Correct compound type and dosing, reduce amplitude |
| Poor surface brightness on aluminum | Wrong compound, ceramic media on soft metal | Switch to 085-type compound and plastic media |
Process Parameter Validation After Corrective Action
After any corrective action is applied, the process must be validated before returning to full production. Running a small test batch with documented parameters allows the engineer to confirm whether the correction resolved the issue without introducing new problems. Key parameters to record during validation include media type and fill level, compound type and dosing rate, machine amplitude and frequency, cycle time, part load volume, and visual or measured surface quality result.
If the corrective action involved changing media type, the validation batch should run for a full production cycle time before evaluation. Media effects on surface quality are time-dependent, and short test runs may not reveal the true finishing result. For critical applications such as medical components or precision aerospace parts, sample testing with surface roughness measurement is recommended before process release.
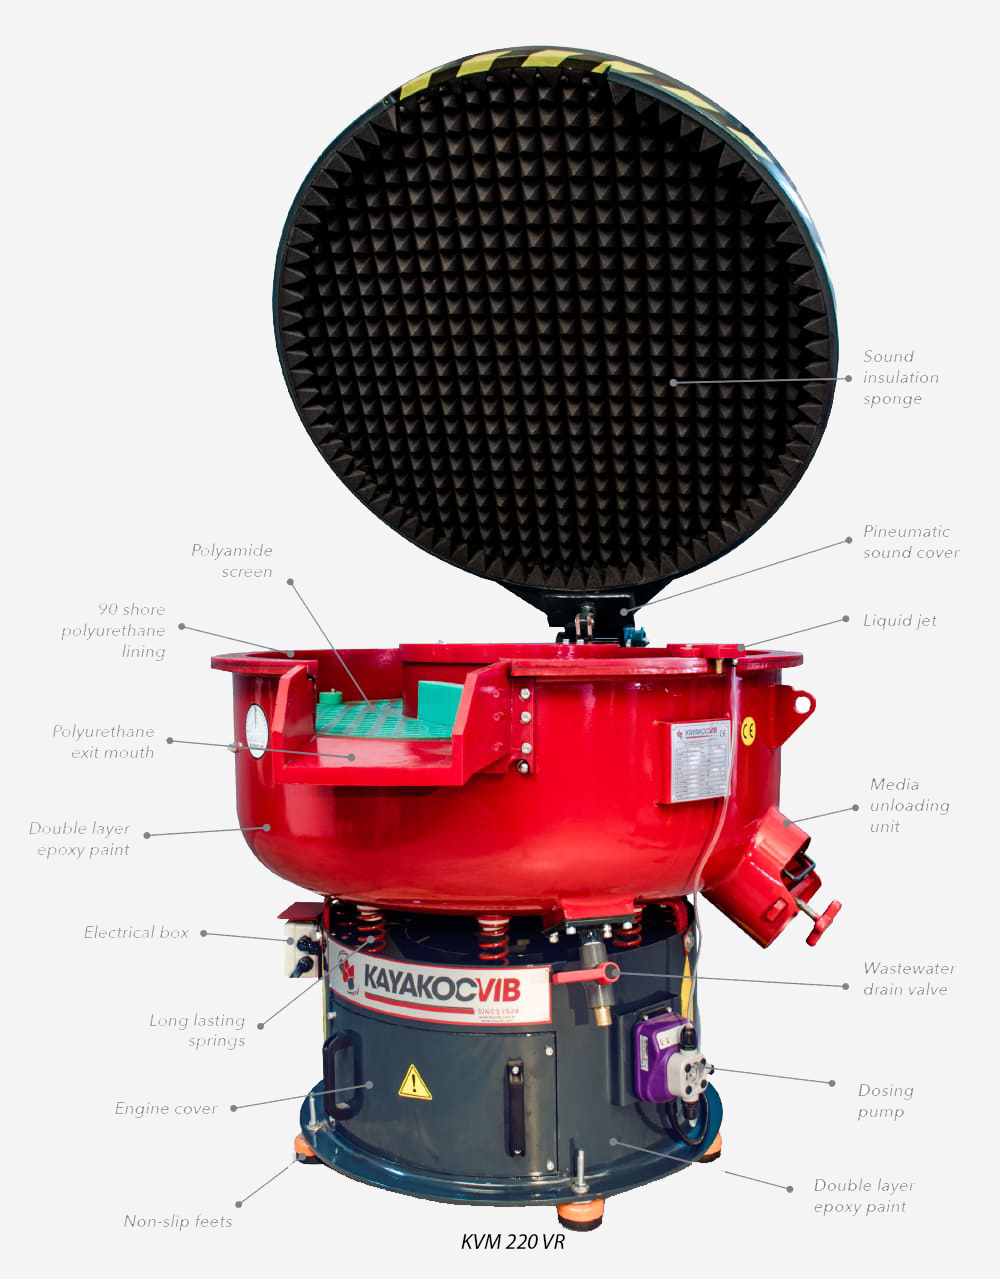
In automated finishing lines integrating machines such as the KAYAKOCVIB KVM circular vibratory machine or KSM centrifugal disc finishing machine with downstream separation, washing, and drying units, parameter changes must be evaluated across the entire line, not only at the finishing machine. A compound dosing change, for example, affects both the finishing result and the rinsing requirement in the washing unit downstream.
Prevention and Long-Term Process Stability
Most recurring finishing defects can be prevented through consistent process discipline rather than reactive troubleshooting. Establishing a formal process record for each validated application, including all key parameters and acceptable result ranges, gives production teams a reference baseline to compare against during routine production monitoring.
Media should be monitored at defined intervals and replaced before it falls below the minimum effective size. Compound dosing systems should be calibrated regularly. Machine amplitude settings should be verified with a vibration meter at defined maintenance intervals. Water quality should be checked periodically, especially in facilities where municipal water supply conditions vary seasonally.
For high-volume production environments, integrating compound dosing controllers, automated compound replenishment, and cycle time monitoring into the finishing line reduces operator-dependent variation and improves batch-to-batch consistency. These automation measures do not eliminate the need for periodic process audits, but they reduce the frequency of uncontrolled drift that leads to defects.
Frequently Asked Questions
What is the first step in surface finishing troubleshooting?
The first step is to identify the specific symptom clearly, such as incomplete deburring, surface staining, or part damage, and then categorize it into media, compound, machine, or part-related causes before making any changes. Changing multiple variables simultaneously makes root cause identification unreliable.
Can the same finishing process be used for aluminum and steel parts?
Generally, aluminum and steel parts should not be mixed in the same finishing batch. Steel parts require ceramic media and alkaline compounds, while aluminum parts perform better with plastic media and pH-neutral or mildly alkaline compounds. Mixing the two can result in surface contamination, galvanic staining, or insufficient finishing on one of the materials.
How often should finishing media be replaced?
Media replacement frequency depends on the application, machine intensity, compound type, and material being finished. In most production environments, media condition should be checked at defined intervals by measuring average media size against the original specification. When average media size has reduced by approximately 30 to 40 percent of original size, replacement should be considered. Actual replacement intervals must be validated for each specific application.
What causes white staining or residue on finished parts?
White residue or staining after finishing is most commonly caused by compound carryover into the drying stage, hard water scale deposits, or insufficient final rinsing. Checking rinse water quality, extending the rinse cycle, and verifying that the drying unit is receiving adequately rinsed parts usually resolves this issue.
Related Process Equipment
Conclusion
Effective surface finishing troubleshooting depends on a structured approach that separates media, compound, machine, and part-related causes before applying corrections. Random adjustment of multiple variables simultaneously increases the risk of masking the actual root cause and introduces new instability into the process. By working through a defined diagnostic sequence, validating corrective actions against a documented process baseline, and maintaining consistent process discipline between production runs, most finishing defects can be resolved systematically and prevented from recurring. Whether the operation involves circular vibratory machines, centrifugal disc finishing, or drag finishing for precision components, the same diagnostic logic applies: isolate the variable, correct it, validate the result, and document the outcome before returning to full production.
Sorry, the comment form is closed at this time.